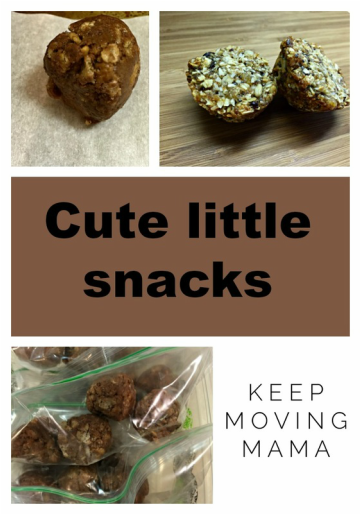
 There is something fun about little snacks. Energy bites, mini muffins, bite size cookies, mini pretzels, honey crisp balls…they are just adorable and fun to eat. Honey crisp balls are beyond a doubt my favorite quick treat to make, and I have to admit my kids LOVE them too. They take all of 10 min to whip up a whole batch and the ingredients are always in my kitchen. 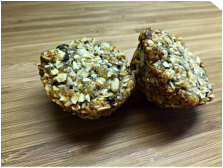 Combine honey, crispy rice cereal, peanut butter and Juice Plus complete in a big bowl. Stir until everything is combined and scoop out balls. Using a cookie scoop like this one from Oxo keeps them all the same size and your hands don't get as sticky rolling them. Place them on a baking sheet covered with foil, then freeze. This makes it a cinch to pick up the paper and pour them into a big freezer bag. To control portions and have a ready to go snack, put 2-3 in a snack size zip lock. Keeping them in the freezer ensures they won’t completely smoosh before you eat them if you take them on the go. Keep Moving tip: Juice Plus complete is a whole food meal or snack replacement powder that I’m personally addicted to. It's all natural ingredients you can feel good about eating. It's perfect for a pre workout smoothie for early morning runs, afternoon snacks, pre practice meals for my kids in that crazy “finish your homework fast so we can make it to your practice on time…oh and eat this on the way” time. My whole family also eats the fruit and veggie capsules to ensure we have exposure to 26+ nutrient dense plants every single day. My distributor website is: www.livemorewith.juiceplus.com if you would like to order or have questions. Aussie bites fit this “cute little snack” category too, and are filled with good for you whole food ingredients. You can certainly buy them at Costco or our local Raleys, but I love to make things from scratch whenever possible. 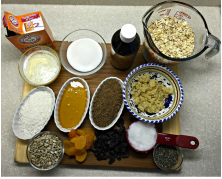 Rachel at The Stay at Home Chef created a great homemade recipe for aussie bites that comes out everytime. Coconut oil subbed for the oil is super yummy. I find these are a good recipe when I have a bit more time to gather ingredients and make a double batch. Makes me hungry just looking at it all. Back to the honey crisp balls, here’s the recipe:
Juice Plus+ complete honey crisp balls Makes 3 dozen, depending on scoop size. 1 cup Juice Plus Complete (Chocolate or Vanilla) 3 cups Rice Cereal 2/3 cup honey 2/3 cup Crunchy or Creamy Natural Peanut Butter
Variations: Add a few tablespoons of ground flax, chia seeds or even mini chocolate chips if you have them on hand. PRINT RECIPE Enjoy your “cute little snacks” and share your favorite cute little snacks below. Thank you for stopping by. Keep moving mama.
3 Comments
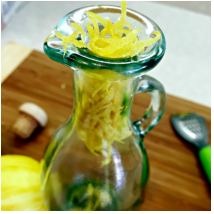 When life gives you lemons, leap for joy! There are so many tasty lemony things to make with them after all. We don’t have any fruit trees in our yard, but on occasion a friend or neighbor will bring over extras. I just LOVE when that happens so I can come up with ways to use them all up and enjoy the home grown taste of fresh fruit. This time it was lemons from my sister in law. We used them on fish, in “fancy” lemon water and then I started to get creative. A successful attempt at vanilla extract recently turned out even more delicious and much less expensive than store bought. So I was off to figure out if I could make a homemade extract from all these lovely lemons. First task was to find a seal-able jar, and HomeGoods had this one on the clearance table no less. Keep moving tip: Typically these little jars are available at Cost Plus for a reasonable cost. This time I just happened to go into Home Goods first since Cost Plus was closed. 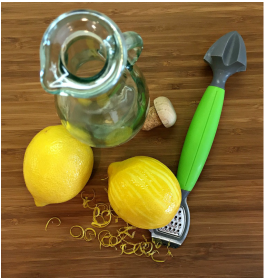 Back at home, I went to town peeling the zest off 3 lemons with this handy Jokari Healthy Steps Citrus Pro 4-in-1 Multi-Tool. You could just as easily use a Microplane like the one in this link, or a simple paring knife. Focus on getting just the peel, not the white pithy part underneath. I used the citrus pro since the peels were much easier to get into the jar than zest would have been. Once you are done, stuff all that clean smelling good lemon peel into your clean jar. Fill nearly to the top with Vodka and seal. Store in a cool, dark place like the back of your pantry for 4-6 weeks. Once a week or so shake the jar a few times and admire how beautiful it is. When you can’t stand the anticipation any longer, try it one of your favorite recipes. If it is strong enough for you, strain the peels and return to your cute little jar. If not, wait another week or so. What will you use this lovely stuff for you ask? I’m planning to use mine in these three recipes to start, maybe not in this order:
Vanilla extract is used in copious amounts in this house. I just love baking and typically double the vanilla in recipes. Since I also add it to smoothies, vanilla lattes’, foamy vanilla steamers, chia tea, sometimes even a splash in hot cocoa...it goes fast. This fact convinced me to try the homemade version although I’m notoriously impatient. That first batch was torture waiting the 4-6 weeks, I made it to 4.5 weeks and the result was worth the wait. Here’s the recipe for the extracts for your torture, I mean pleasure: 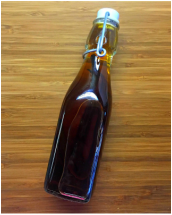 Homemade extract Lemon peels from 3 lemons 6 oz. Vodka
Vanilla extract: sub 2-3 vanilla beans. Cut them down to side first. These amounts are variable, add more to increase the intensity or store longer before using. PRINT RECIPE Looking forward to hearing what you think of this homemade, fun project. #keepmovingmama to show off your version on Instagram so we can see your results! Enjoy, eat and please share. Keep moving mama. 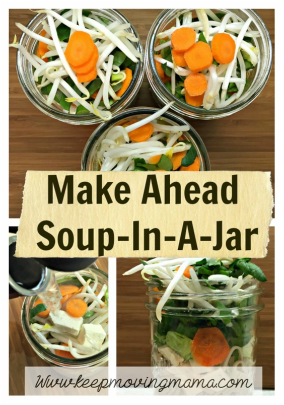 Planning meals ahead makes it so much easier to make healthy choices. You have probably heard of salad in a jar, and maybe even tried it. Layering ingredients in a jar so that they will last for future lunches or any one the go meal is brilliant. This idea takes the same concept to warm, comforting, good for you soup. These Asian inspired noodle soup bowls heat up in minutes and are totally filling. Layer your tasty ingredients at the bottom of the container, pile in the noodles, top with veggies and seal. When you are set to eat, just add boiling water to the pot and let it sit a few minutes. Crispy veggies in warm soup in minutes. Delicious! 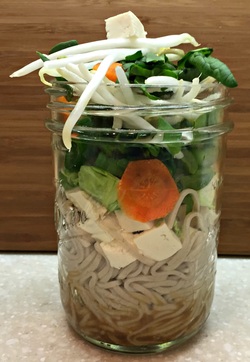 Soup In a Jar Makes 4 servings in less than 10 minutes 3 tbsp Reduced sodium Soy sauce 1 tsp Wasabi paste ½ tsp Siracha hot chili sauce - more if you like spicy 3 tsp better than bullion reduced sodium chicken soup base 3 bundles of Buckwheat Japanese noodles – cooked and cooled 12.3 ounces Firm Silken tofu, cubed - or another lean protein, leftover chicken works perfect ½ c. brussel sprouts sliced 1 cup bean sprouts 2 carrots, peeled and sliced Handful of spinach Boiling water In a small bowl, stir soy sauce, wasabi paste, Siracha sauce and chicken base together. Pour 1/4 into each of four 12 ounce Ball jars. Layer in tofu, veggies and put on the lid. Keep in the refrigerator up to 5 days. Fill the jar to the top with boiling water, put the lid back on and let sit for 5 minutes. Give it a shake, open and enjoy. Keep Moving Tip: In 12 oz. Ball jars, the ingredients packed the jars to the top. If you prefer more broth, use a larger jar or make 5 jars. Recipe adapted from The Londoner’s traveling noodles recipe. Print Recipe 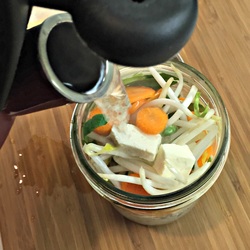 Have fun with these, use ingredients you like or have on hand. They are completely flexible. Ball jars are my container of choice, I have a bunch around and they do well with hot liquids. Not to mention they’re just cute. My water glass is a Ball jar too, it’s a thing. When you give it a try let me know what you think, what variations you come up with. #keepmovingmama with your photos on Instagram so we can see your creations too! 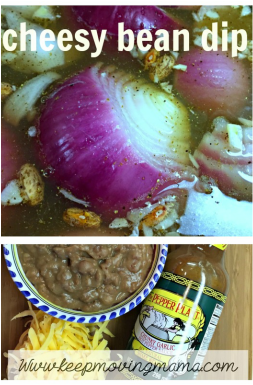
Finger food is perfect for game day.
Typically football weekends are my time at home to try new recipes and meal plan for the week ahead. My family loves football, I love cooking, it's a win-win situation. But I do like watching the Super Bowl...maybe for the commercials, maybe not. Finger food is not your typical health food that's for sure. This year, I’m making a "healthified" version of the processed cheese food, canned beans and salsa dip recipe of the past with cheesy bean dip. 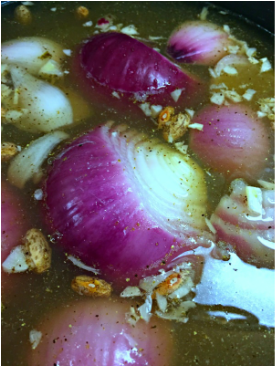
Today, I’m making a big batch of not-fried re-fried beans. This recipe came from Homemaker in Training, Amy spoke at one of our local moms groups several years ago and share this recipe. I have adapted it with less salt, more cumin and have long since stopped measuring ingredients it's so easy. These beans are multi-taskers; we’ll have bean burritos tonight, a bean dip Sunday, and beans stocked up in the freezer for burritos, taco salad or quesadillas another day. True to my promise this recipe is super simple too. It’s made in the crockpot, who doesn’t love an appliance that cooks while you go about your day? This recipe doesn’t even require presoaking the beans, yahoo. Crockpot recipes should be throw it all in, let it cook and take it out at dinner time. I’m good with chopping, but would rather not have to cook something first. Maybe that’s just me. Cheesy Bean Dip Chop: 2 Tablespoons chopped garlic 1 whole Onion – chop the ends off and peel off the skin ½ to 1 whole Jalapeno (adjust depending on your love of spicy) Measure: 2 teaspoons salt 2 teaspoons ground pepper 1 teaspoon ground cumin 3 cups dry pinto beans Just for the dip: 1 cup shredded cheddar cheese Hot sauce – to taste Tortilla chips Throw it all into the crockpot, add water until everything is covered. Turn on high for 8 hours. Test the beans for tenderness, when they are soft and super yummy you're set to go. Tonight, I’ll scoop out whole beans to add to our burritos. 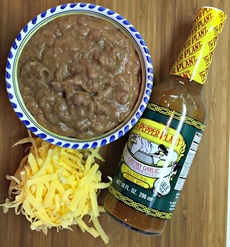
For the Super bowl bean dip, we’re mashing into a traditional re-fried bean consistency. Scoop out about 2 cups of beans, add half cup of bean water (it’s magic stuff, all the seasoning is in there) and mash with your potato masher or a fork. Add more water if you like. Stir in shredded cheese and a hot sauce to taste, mix again.
PRINT RECIPE Our favorites: Pepper Plant: My husband and I both went to Cal Poly in SLO so we are partial to this local product.
Tostitos: They have just 3 ingredients: whole white corn, vegetable oil and salt.
With a large batch, I would put this out in a fondue pot to keep it warm. Honestly it doesn’t last long enough to get cold with the four of us. True.
For the multi-tasking part, you take the rest and freeze in zip locks for the next bean occasion with some magic bean water. A whole batch is typically 3-4 meals worth as an add-in or side dish. Enjoy your Super Bowl Sunday, “healthified” food and all. What’s on your finger food menu? Keep Moving Mama, and please share! |
Wendy Hoag
Combining a love of real food, commitment to exercise, a home based business and a family without going over the edge is the balance I seek daily. There is a confidence that comes from combining these things into life. Archives
August 2022
Categories
All
This blog post contains affiliate links to products I recommend and use myself. If you choose to buy them I may receive a small commission at no extra cost to you. Thank you for your support!
|


 RSS Feed